Saturday, May 31, 2014

Montees

The first time I'd heard of these pretty little gems was in one of Kelly Dale's YouTube beading video tutorials. I didn't give them much thought though because I figured they were out of my price range and I was right. The subject came up recently on my Pinterest "Crafty Inspirations" board when Dolly Smith posted her lovely bracelet HERE. She made it from Kelly's "Montee Embellished Pearl Bracelet" video tutorial, which is the one I had seen. You can watch HERE.

Here is Dolly's bracelet:


 Dolly sent me enough of the same blue montees she used to make a bracelet and I've been trying different things with them to find just the right pattern to suit my style. So, I thought I'd blog about montees just for fun. I don't really know much about them but they do seem to pop up here and there on blogs and in Etsy shops, etc. I think they're technically called "Rose Montees" and they're made by Swarovski and also by Preciosa. There are also some called Chaton Montees. The difference appears to be in the type of stone in the setting. Rose Montees are a bit flatter due to the flat backs on the stones. Chaton Montees are thicker because the stones have a point on the back. The ones I have are Rose Montees and they're about 4mm in diameter. 3.9mm is the actual size and the size is referred to as "16ss" (stone size). Mine are in a gold metal setting with two holes in the base that form an "X". There is also another type that I've seen that have two parallel holes. I found a tip somewhere online that suggests using FireLine with montees because the metal edges of the setting can cut regular Nymo type thread.
 
ROSE MONTEES
CHATON MONTEES
I have to say that they are fun and easy to work with and add a nice sparkle to beadwork. I'm pretty sure that I know what I'm going to make with mine as you'll see below. First, here are some links for inspiration as well as some places to buy them.

PLACES TO BUY MONTEES

Dreamtime Creations

Fusion Beads

Shipwreck Beads

Crystallized Montees Etsy

Aria Design Studio Etsy

Bead Me A Story Etsy (acrylic montees)

Off the Beaded Path
Click the size links to see what Kelly has for sale. Her site gives the impression that she only has one color/size in stock but there are lots of them there.

PATTERNS USING MONTEES

Rosanna Swarovski Rose Montee and SuperDuo Bracelet (Isabella Lam - Etsy
Pacific Lace Swarovski and SuperDuo Bracelet (Isabella Lam - Etsy)

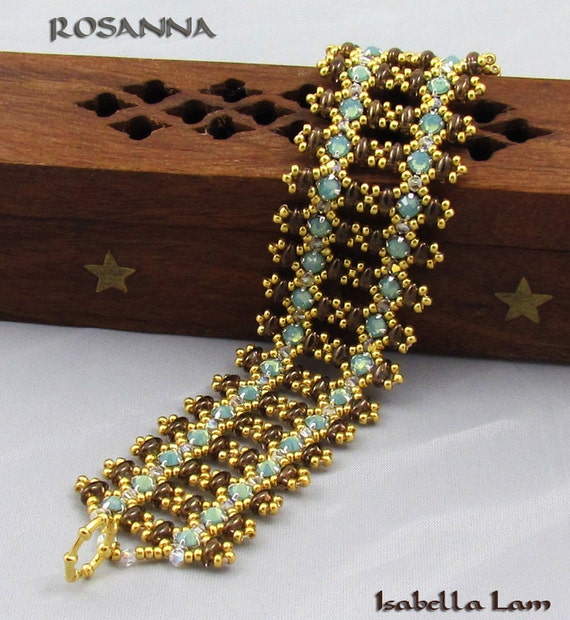
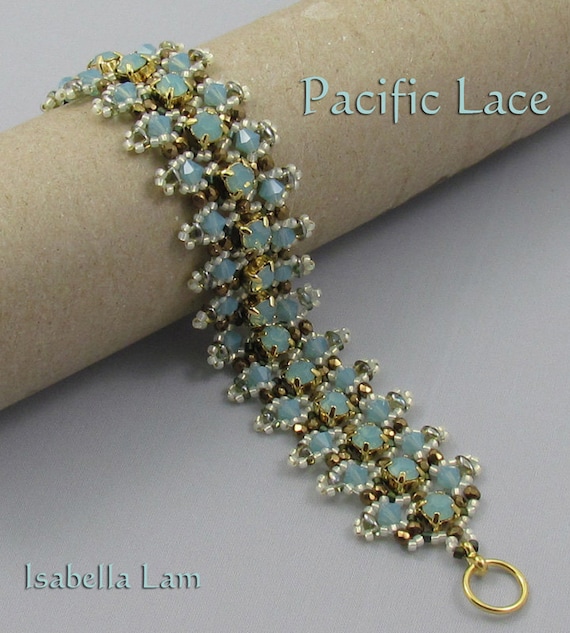
LUMINOS DUO Bracelet 
(Isabella Lam)
 
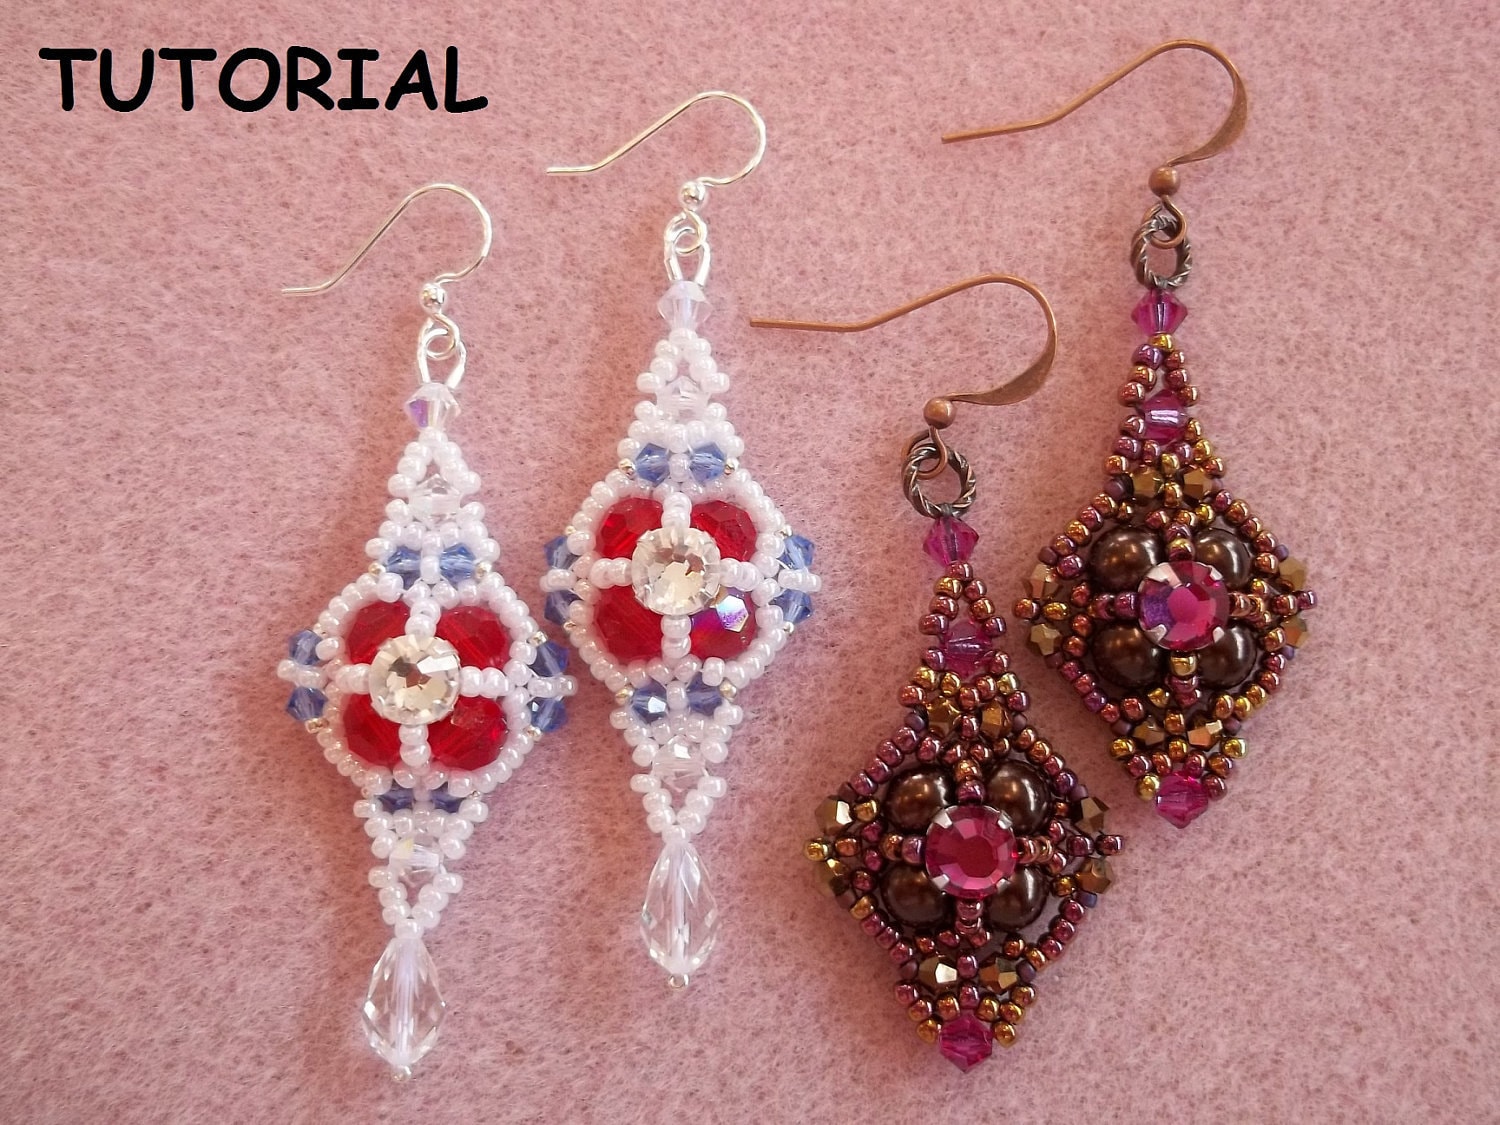
Sparkling Posie Earrings (ArtfulBeadStudio Etsy)


Starry Night Super Duo Necklace (ArtfulBeadStudio Etsy)

Wrist Full Of Posies Bracelet (ArtfulBeadStudio Etsy)


Bow Tie Bracelet (YouTube Video by Kelly Dale)
Buy the pattern HERE

Bow Tie Necklace (YouTube Video by Kelly Dale)
Buy the pattern HERE

Perfect Storm Necklace (YouTube Video by Kelly Dale)
Buy the pattern HERE

Queens Jubilee Earrings (YouTube Video by Kelly Dale)
Buy the pattern HERE

Two Hip to be Squared Bracelet (YouTube Video by Kelly Dale)
Buy the pattern HERE

Easy Montee Earrings (YouTube Video by Kelly Dale)

Halo Bracelet (no video available)
Buy the pattern HERE

Montee Embellished Pearl Bracelet (YouTube Video by Kelly Dale)
Buy the pattern HERE

Montee Lace Bracelet (SianNolan Etsy)

Copper Pearl Montee Metal Bracelet (darlovely on Craftsy)

Below are the samples that I made last night. I'm pretty sure that I'm going to make the version with the black bicones. I ran out of thread while adding the picots on that sample and I do plan to add them to my final bracelet. My husband agreed with me that the picots balance out the proportion of the design. Although I like the pearl version, I like how the blue montees really pop against the black bicones. They seem to fade into the background on the pearl sample. I went with a brighter bronze color for the seed beads in my sample to try and get close to the gold color of the settings on the montees.

Here's the break-down:
PEARL SAMPLE

  • 15/0 seed beads Miyuki "Bronze" (15-457)
  • 11/0 seed beads Miyuki "Bronze" (11-457)
  • 3.9mm "Blue" Montees
  • 4mm pearls "Beige #10" (Beads One)

BICONE SAMPLE
  • 15/0 seed beads Miyuki "Bronze" (15-457)
  • 11/0 seed beads Miyuki "Bronze" (11-457)
  • 3.9mm "Blue" Montees
  • 4mm bicones "Jet #C04" (Beads One - color no longer available)
By the way, I'm not following any particular pattern in my samples but it's based on the "Diamond Chain" design, which I blogged about HERE.


Friday, May 30, 2014

A Couple of Bracelet & Earring Sets

I recently made two SuperDuo Rosette bracelets using some of those pretty "suede" SuperDuos. Today I'm wearing the darker one and didn't have any earrings that would go well with it. So, I whipped up a pair of my SuperDuo Flower Chain Earrings using the same color beads. While I was at it, I also made the same earring pattern in the color I used for the other bracelet. The earrings aren't anything fancy but they suite my style perfectly. Because those two bracelets are almost negative images of each other, I probably could switch around the bracelets and earrings. The only drawback to that idea is that I used different "metal" seed beads in each one. I suppose that wouldn't really be noticeable though with my hair partially covering my earrings. I blogged about the two bracelets HERE and HERE. I'm sure that they're available elsewhere but I've only seen the suede SuperDuos in Aria's Etsy shop and on the Red Panda site.

Here are the two pairs of earrings that I just made and the beads I used to make them:


  • 11/0 seed beads Miyuki "Brown Bronze Matte" (11-457P)
  • 8/0 seed beads Miyuki "Brown Bronze Matte" (8-457P)
  • SuperDuo beads "Metallic Suede Olive"


  • 11/0 seed beads Miyuki "Dark Bronze" (11-457D)
  • 8/0 seed beads Miyuki "Dark Bronze" (8-457D)
  • SuperDuo beads "Metallic Suede Gold"

You can buy the SuperDuo Rosette Bracelet pattern HERE and you can download my free earring pattern HERE. This is a tweak of my pattern. I simply left off the little motif at the top and added an 8/0 seed bead for the jump ring.

Here's a picture of both sets as well as a couple other earring samples that would go well with the bracelets too:

I also tried a couple of experiments this afternoon with the pretty montees that Dolly Smith sent me the other day. First I watched Kelly Dale's YouTube video for her "Bowtie Bracelet". Here's the sample that I made from that tutorial:
It's alright but it's not really my style and I'm not wild about all those 6mm bicones. I'm still experimenting and I'm probably going to do something similar but with 4mm bicones instead.


Wednesday, May 28, 2014

Layered Tila Earrings - A Small Tweak

I got an idea after making the Tiny Treasures Earrings the other day. I've made many pairs of Layered Tila Earrings in all different colors but it bugs me that they have a tendency to spin sideways when I wear them. When I saw how nice and straight the Tiny Treasures earrings hang, I thought I might be onto something. I think the spinning problem was probably caused by having the fire polished bead in between the earring and the loop for the wire. I eliminated that and added the little "cross" of beads like on the Tiny Treasures and also added the same kind of loop at the top. That did the trick and I like how the loop looks even better than the way I was doing them before. The new loop has a little bit wider and chunkier look that better suits the shape and size of the earring.

Here is how they looked with the old loops:


And, here is how they look with the new ones:


I remade that pair of earrings last night using the new method. I've got three other pairs that I will remake as I find the time. I enjoy making that pattern so it won't be too much of a bother.

The Layered Tila Earrings are my adaptation of MyAmari's free bracelet pattern which you can find HERE. Well, it used to be there but today I'm just getting a blank page. Hopefully it's just a temporary glitch. It's not just that particular page. I can't get the main page of her site to load either.

I blogged about these earrings on May 11th, HERE. You will find the bead color information in that post and see the bracelet that I made them to go with.


UPDATE: Yvonne King's (MyAmari) "Layered Tila Bracelet" pattern is now available from her blog HERE.

UPDATE 6/6/19: All of the previous links to this pattern are dead. You can get the free "Layered Tila Bracelet" pattern HERE on Bead-Patterns.com. 


Tuesday, May 27, 2014

Tiny Treasures Earrings Update

I chose three of my favorite color combinations and made myself three pairs of Tiny Treasures Earrings yesterday. I love all three and it's nice that they each have different "metal" colors; silver, copper and bronze. I did use different bicones in the pair with the pearls but I can't really tell the difference. I used some dark rose colored bicones instead of "Golden Shadow AB", which is more of a beige color. I can see the rosy tint in the ones I used if I hold them up to the light but not against my dark hair when I'm wearing them.
You can see what beads I used in my previous post HERE. The pattern is by Cynthia Newcomer Daniel and you can buy it HERE.


Sunday, May 25, 2014

Playing with my beads...

Here are a few experiments from yesterday and today. The first photo shows some color variations of the "Pearl Earrings" that I wrote about on May 6, HERE. If you read the comments below that post, there's a discussion with someone who posted their version of the earrings I was trying to recreate. Their method worked great and here are some of the results:


I only have one color of 10mm round crystals so I was limited to varying the seed bead color and the bicones and pearls that surround the center bead. My favorite is the sample that's second from the right. I'm not crazy about how the light colored pearls and druks stand out so much in the other samples. The Smoky Topaz Luster druks blend in nicely. As soon as Beads One has their next sale, I'll pick up some 10mm crystals in other colors to play with.

My next experiment was to try another one of Cynthia Newcomer Daniel's earring tutorials called "Zosia Rivoli Earrings" which you can buy on Etsy, HERE. I'm not sure yet how well I like them and the pattern was very difficult to figure out. The tutorial was so confusing that I'm surprised that I actually completed an earring on my first try. I'm sure that it won't be so bad the next time now that I know what to expect and I will try using an 11mm rivoli next time. My 12mm one seemed a little too big for the bezel. There are too many gaps between the seed beads and no amount of tugging on the thread would pull them closer together. I didn't have a lot of color choices for the beads to go with my rivoli so I went with bronze druks and a blue bicone that sort of went with the "Seal" color of the stone. I think I might have more colors to choose from to go with some of the 11mm rivolis that I've got.

It doesn't look too bad in the photo but there are lots of spots that really should have been tightened up and reinforced.

As therapy after that ordeal, I tried my very first peyote bezel from one of Deborah Roberti's patterns called "Holiday Bracelet" which you can buy HERE. I knew this one would be fun and easy to follow and I was right. Here is the result:

It's a very pretty motif but I'm not sure yet what I'd use it for. My wrist is too skinny for such a large scale bracelet. It's also a little too big for an earring. Perhaps a pendant would be good use for it as the pattern suggests.

Here are the ingredients that I used in my experiments:

PEARL EARRING #1 (going from left to right in the photo):

  • 10mm round crystal "#C12 AB" (Beads One)
  • 15/0 seed beads Miyuki "Dark Bronze" (15-457D)
  • 11/0 seed beads Miyuki "Dark Bronze" (11-457D)
  • 4mm bicones "Amethyst #C12" (Beads One)
  • 4mm druks "Bronze Illusion"
PEARL EARRING #2:
  • 10mm round crystal "#C12 AB" (Beads One)
  • 11/0 seed beads Miyuki "Light Bronze" (11-457L)
  • 4mm bicones "Light Smoked Topaz #C29 AB" (Beads One)
  • 6mm druks "Gold & Smoky Topaz Luster"
PEARL EARRING #3:
  • 10mm round crystal "#C12 AB" (Beads One)
  • 15/0 seed beads Miyuki "Dark Bronze" (15-457D)
  • 11/0 seed beads Miyuki "Dark Bronze" (11-457D)
  • 4mm bicones "Light Smoked Topaz #C29 AB" (Beads One)
  • 4mm druks "Bronze"
PEARL EARRING #4:
  • 10mm round crystal "#C12 AB" (Beads One)
  • 15/0 seed beads Miyuki "Dark Bronze" (15-457D)
  • 11/0 seed beads Miyuki "Dark Bronze" (11-457D)
  • 4mm bicones "Light Smoked Topaz #C29 AB" (Beads One)
  • 4mm druks "Gold & Smoky Topaz Luster"
PEARL EARRING #5:
  • 10mm round crystal "#C12 AB" (Beads One)
  • 15/0 seed beads Miyuki "Dark Bronze" (15-457D)
  • 11/0 seed beads Miyuki "Dark Bronze" (11-457D)
  • 4mm bicones "Amethyst AB - #C12 AB" (Beads One)
  • 4mm pearls "Light Bronze" (Beads One - not online)
ZOSIA RIVOLI EARRING:
  • 12mm rivoli Swarovski "Seal" (#1122)
  • 15/0 seed beads Miyuki "Light Bronze" (15-457L)
  • 11/0 seed beads Miyuki "Light Bronze" (11-457L)
  • 4mm bicones "Denim Blue" (from Walmart)
  • 3mm druks "Bronze"
  • 4mm druks "Bronze"
HOLIDAY BRACELET BEZEL:
  • 12mm rivoli Swarovski "Seal" (#1122)
  • 15/0 seed beads Miyuki "Dark Bronze" (15-457D)
  • 11/0 seed beads Miyuki "Dark Bronze" (11-457D)
  • 11/0 Miyuki Delicas "Metallic Dark Steel" (DB26)
  • 11/0 Miyuki Delicas "Metallic Bronze" (DB22)
  • 4mm bicones "Jet #C04" (Beads One - no longer available)
  • 4mm pearls "Light Bronze" (Beads One - not online)

Saturday, May 24, 2014

Pattern Review: Tiny Treasures Earrings

I thought you might like to see what I've been up to for the past couple of days. I was experimenting with a new earring pattern that I bought the other day. It's called "Tiny Treasures Earrings" by Cynthia Newcomer Daniel and you can get the pattern from Jewelry Tales HERE or on Etsy HERE. I found the instructions and some of the diagrams to be a little vague but I did figure them out through trial-and-error. There's no indication in the diagrams which beads were added in previous steps and which ones you're currently adding. I think that a few arrows showing the thread paths might also be useful.

The earrings come out really cute but it does make a difference what kinds of beads you use and also the colors you use. Some look great and others not so much. I like that the design is very unique and the shape is nothing like anything I've seen elsewhere. They look a lot like actual metal antique/vintage earrings when you're wearing them.

I went through my stash of bicones and 11/0 seed beads, etc. to come up with as many color combinations as I could. I also tried different "metal" colors. Miyuki "Dark Bronze" (457D) is the clear winner of the metals but I do like some of the others too. Dark Bronze has the most antique look, I think. Besides using 11/0 seed beads, I also used a couple other kinds of beads of the same size in my samples. One sample has tiny 2mm pearls and another one has tiny cubes that just happened to match some bicones perfectly.

Although the seed bead and bicone embellishments on these are a bit raised and dimensional, there is a trick that will make them look a bit more like they're set into the "metal" base of the earring. When you're weaving the three "petals", keep your stitching on the loose side so that when you add the embellisment beads later, they will sort of nestle down into the petals a bit. Cynthia does mention this in the tutorial, but she doesn't explain why you should do this.

I did change one thing and that's the loop for the earring wire. I wanted my loop to have more of a distinct shape rather than just a circle of beads. Mine are inspired by some of the loops that Sidonia often uses on her beadwork projects. At the point in the tutorial when you're instructed to make the loop, I picked up seven 15/0 seed beads then went back around through the 11/0 seed bead I just exited. Next, I went back up through the first 15/0 seed bead of the loop. I picked up a 15/0 seed bead and proceeded through the next five 15's of the loop. Then, I picked up one more 15/0 and went through the last 15/0 of the loop and the 11/0 bead where I started from. I went around the loop a couple of times to reinforce it. I also reinforced all of the other parts of the earrings to tighten up beads that needed to be snugged up a bit and also to even out the shape of the main open loop in the center of the earrings. I wanted nice, neat netting on mine.

I've got two more tips for this pattern. When you're making the main loop in the center of the earring, go back around once and "pop out" the 11/0 seed bead that's in the middle of the three at the top. This helps shape the earrings a little bit better. The other thing that I did was flatten my samples under a stack of very heavy books. It did seem to make a difference. I placed them on a paper towel and put another paper towel over them to protect them. I stacked about five huge books on top of them and left them like that overnight. The earrings still aren't flat, due to the embellishment beads, but they seem to look a little more neat and tidy, if you know what I mean.

Here's the break-down of the beads I used in each sample. Bear in mind that I don't have any color or brand info on a lot of the special beads. I have a lot of odds and ends that have been given to me that don't have that information. They're the sort of things that are perfect for this project because you only need a few beads in each color.


  • 15/0 seed beads Miyuki "Dark Bronze" (15-457D)
  • 11/0 seed beads Miyuki "Dark Bronze" (11-457D)
  • 4mm bicones "Seafoam/Aqua" (from Walmart)
  • 11/0 seed beads Toho "Light Topaz/Sea Foam Lined" (TR-11-952/c)
[This is one of my favorites]


  • 15/0 seed beads Miyuki "Dark Bronze" (15-457D)
  • 11/0 seed beads Miyuki "Dark Bronze" (11-457D)
  • 4mm bicones "Golden Shadow #C25AB" (Beads One)
  • 2mm pearls "Light Champagne" (Aria Design Studio Etsy)
[This is one of my favorites]


  • 15/0 seed beads Miyuki "Olivine" (15-458)
  • 11/0 seed beads Miyuki "Olivine" (11-458)
  • 4mm bicones Swarovski "Sand Opal"
  • 11/0 seed beads "Transparent Gold Lined" (no info)


  • 15/0 seed beads Miyuki "Dark Bronze" (15-457D)
  • 11/0 seed beads Miyuki "Dark Bronze" (11-457D)
  • 4mm bicones "Denim Blue" (from Walmart)
  • 11/0 seed beads "Black Diamond" (no info)
[This is one of my favorites]


  • 15/0 seed beads Miyuki "Bronze" (15-457)
  • 11/0 seed beads Miyuki "Bronze" (11-457)
  • 4mm bicones "Light Colorado #C26AB" (Beads One)
  • 11/0 seed beads "Topaz Lined Aqua" (no info)
[This is one of my favorites]


  • 15/0 seed beads Miyuki "Dark Bronze" (15-457D)
  • 11/0 seed beads Miyuki "Dark Bronze" (11-457D)
  • 4mm bicones "Emerald" (no info)
  • 11/0 seed beads "Topaz Lined Teal" (no info)


  • 15/0 seed beads Miyuki "Antique Silver-Nickel" (15-464A)
  • 11/0 seed beads Miyuki "Antique Silver-Nickel" (11-464A)
  • 4mm bicones "#C53" (Beads One)
  • 11/0 seed beads "Dark Copper Lined" (no info)
[This is one of my favorites]


  • 15/0 seed beads Miyuki "Dark Bronze" (15-457D)
  • 11/0 seed beads Miyuki "Dark Bronze" (11-457D)
  • 4mm bicones "Dark Rose" (no info)
  • 11/0 seed beads Toho "Inside-Color Montana Blue/Oxblood Lined" (TR-11-363/c)
[This is one of my favorites]

  • 15/0 seed beads Miyuki "Duracoat Galvanized Pale Mink" (D4221)
  • 11/0 seed beads Miyuki "Duracoat Galvanized Pale Mink" (D4221)
  • 4mm bicones "Amethyst" (no info)
  • 11/0 seed beads Toho "Silver-Lined Frosted Amethyst" (TR-11-26CF/c)


  • 15/0 seed beads Miyuki "Dark Bronze" (15-457D)
  • 11/0 seed beads Miyuki "Dark Bronze" (11-457D)
  • 4mm bicones "Lavender" (no info)
  • 11/0 seed beads "Metallic Purple" (no info)
[This is one of my favorites]


  • 15/0 seed beads Miyuki "Light Bronze" (15-457L)
  • 11/0 seed beads Miyuki "Light Bronze" (11-457L)
  • 4mm bicones "Vitral Green #C50" (Beads One)
  • 11/0 seed beads "Champagne Lined" (no info)


  • 15/0 seed beads "Metallic Chocolate" (no info)
  • 11/0 seed beads Miyuki "Metallic Chocolate" (11-461)
  • 4mm bicones "Pale Bittersweet" (no info)
  • 11/0 cube beads "Pale Bittersweet AB" (no info)
[This is one of my favorites]

Friday, May 23, 2014

Bracelet of the Day: Duo Bobble Band Variation - Turquoise Picasso

DUO BOBBLE BAND VARIATION (Liz Band)
  • 11/0 seed beads Miyuki "Metallic Olive Brown" (11-457H)
  • SuperDuo beads "Opaque Light Blue Picasso"
  • 3mm metal beads "Antique Brass" (Hobby Lobby)
One more color combination using the same pattern as yesterday's bracelet. I've been working on a bunch of earrings in the past couple of days so it might be a little while before I make another Bracelet of the Day.

UPDATE 2/13/18: A free pattern is now available and the new name for this pattern is "Liz Band". Visit THIS post to download the free pattern.